
Do It Yourself Dog Crate: Creative Ideas and Tips
Imagine the joy of creating a personalized space for your furry friend right in your home. A DIY dog crate not only saves money but also lets you design a cozy corner tailored just for your pup.
You might be wondering how you can transform simple materials into a safe haven that your dog will adore. This guide will show you how with easy steps and helpful tips. By the time you finish reading, you’ll feel confident and excited to start your own DIY dog crate project.
Let’s dive in and unleash your creativity!
Benefits Of Diy Dog Crates
Creating a DIY dog crate offers cost savings and customization. Tailor the design to fit your dog’s needs and your home’s style. Personalize materials and dimensions for comfort and security.
Creating your own dog crate can be a rewarding project. It offers many advantages over buying a store-bought crate. You can tailor the design to fit your dog’s needs and your home’s style. Building it yourself also provides cost savings and a sense of accomplishment. Let’s explore some key benefits of DIY dog crates.Custom Design
You decide the size and shape of the crate. This ensures a perfect fit for your pet and your space. Tailor it to match your home’s decor. Use materials that blend with your interior design. Personalized crates add a unique touch to your living area.Cost-effective
Building a dog crate saves money. Store-bought crates can be expensive. Using materials at home reduces costs. You also avoid extra fees for features you don’t need. DIY lets you choose affordable materials without compromising quality.Bonding Experience
Building a crate strengthens the bond with your dog. Involving family in the project adds fun and teamwork. Working together on this enhances relationships. It’s a shared activity that everyone can enjoy.Eco-friendly
DIY crates promote environmental sustainability. Use recycled or eco-friendly materials. This reduces waste and carbon footprint. It contributes positively to the environment.Tailored Comfort
Choose materials that offer comfort for your pet. Add soft bedding and cushions. Ensure proper ventilation for your dog’s health. Custom design means a cozy and safe space for your furry friend.Materials For Building A Dog Crate
Crafting a dog crate on your own can be a fulfilling project. Choosing the right materials is crucial. Each material offers unique benefits and challenges. Whether you prefer wood, metal, or recycled materials, it’s important to understand your options. Let’s dive into the materials that can help you build a sturdy and safe crate for your furry friend.
Wood Options
Wood is a popular choice for DIY dog crates. It offers warmth and a natural look. Several types of wood can be used based on your preference and budget.
- Pine:Affordable and easy to work with.
- Oak:Strong and durable, lasts a long time.
- Cedar:Naturally repels insects, ideal for outdoor crates.
Each type provides distinct benefits. Choose the one that matches your project needs.
Metal Choices
Metal crates are durable and secure. They are excellent for dogs that chew. There are several metal options you can consider.
- Steel:Strong and resistant to damage.
- Aluminum:Lightweight, yet sturdy.
- Iron:Heavy, but offers great stability.
These metals ensure the crate is robust and long-lasting.
Recycled Materials
For eco-conscious builders, recycled materials offer a sustainable choice. They are often easy to find and affordable.
- Old Furniture:Repurpose old tables or cabinets.
- Pallets:Versatile and can be used for various parts.
- Scrap Metal:Use for a rustic look and sturdy structure.
Using recycled materials can give your crate a unique character. Plus, it’s environmentally friendly.
Tools Required
Building your own dog crate requires basic tools like a screwdriver, measuring tape, and a saw. Ensure you have screws, hinges, and sandpaper for smooth edges. A drill might be needed for assembling the frame securely.
Crafting a DIY dog crate is an exciting project for any pet lover. Not only does it allow you to customize the perfect space for your furry friend, but it also lets you showcase your creativity. To get started, gathering the right tools is essential. With the right equipment, you can ensure a smooth and enjoyable building process. Below, we’ve outlined the essential and optional tools that will aid you in creating a durable and stylish crate.Essential Tools
To begin your DIY dog crate project, there are a few tools you can’t do without. A measuring tape is your best friend; it ensures accuracy and helps in planning the perfect size for your pet. A saw is crucial for cutting wood or any other material you choose. Whether it’s a handsaw or a power saw, precision is key. A drill, accompanied by a set of bits, will help you assemble the pieces together. It’s worth investing in a good-quality drill, as it saves time and effort. Lastly, a hammer and nails or screws are necessary for securing your structure. Consider using a level to ensure everything is perfectly aligned.Optional Tools
While the essentials are necessary, some optional tools can make your project easier and more polished. A sanding block or an electric sander helps to smooth out rough edges, making the crate safe and comfortable for your dog. Paintbrushes and non-toxic paint or stain can add a personal touch, allowing you to match the crate with your home decor. A staple gun can be useful if you plan to add any fabric or lining inside the crate, enhancing comfort. Consider a square tool to maintain perfect angles and corners, especially if you’re aiming for a professional finish. Have you thought about including a decorative nameplate? You might need a small engraving tool for that personal touch. Think about your dog’s comfort and safety. These optional tools can elevate your project from basic to extraordinary.
Credit: www.yahoo.com
Design Ideas For Dog Crates
Create a cozy space for your pet with a DIY dog crate. Personalize it using wood or metal, ensuring it matches home decor. Add a soft cushion inside for comfort.
Designing a dog crate can be an exciting and rewarding project. Whether you’re crafting a simple nook or a stylish piece that complements your home, there are endless possibilities. Each design has its own charm, catering to both your dog’s needs and your home’s aesthetic.Simple Designs
Creating a basic dog crate doesn’t mean sacrificing quality. Simple designs can be both functional and elegant. Consider using durable wood and basic tools to build a crate that provides comfort and security. – Materials: Opt for materials like plywood or reclaimed wood. – Tools: A saw, hammer, and nails are often all you need. – Size: Ensure the crate is large enough for your dog to stand and turn around. A minimalist crate can blend seamlessly with your decor, providing your dog with a cozy space without the extra fuss.Stylish Crates
Why settle for ordinary when you can have extraordinary? Stylish crates can serve as a dual-purpose piece in your home. Think of it as an opportunity to showcase your creativity. – Design: Consider a crate that doubles as a side table or a piece of furniture. – Finish: Use stains or paints that match your interior design. – Features: Add decorative elements like lattice or molding. A stylish crate can be a conversation starter. It’s not just a place for your dog—it’s a statement piece.Space-saving Solutions
If space is at a premium, a space-saving crate design is a must. These solutions ensure your dog has a comfortable place while maximizing your living area. – Multi-Functional: Consider crates that double as storage. – Foldable: Look for designs that can be easily folded and stored when not in use. – Placement: Utilize corners or under-stair spaces for crate placement. Have you considered how a cleverly placed crate can open up your room? Space-saving designs can make your home feel more spacious and organized. By choosing a design that suits your home and lifestyle, you’re not just building a crate—you’re enhancing your living environment. What kind of crate will you create?Safety Considerations
Ensure your DIY dog crate is free of sharp edges to prevent injuries. Use non-toxic materials safe for pets. Secure all parts properly to avoid collapse or escape.
Creating a DIY dog crate can be a rewarding project, allowing you to tailor it to your pet’s needs while saving some money. However, ensuring the safety of your furry friend should be your top priority. From the materials you choose to the way you build, every aspect plays a crucial role in keeping your dog secure and comfortable. Let’s explore some key safety considerations to keep in mind.Secure Fastenings
The structure of your dog crate must be solid and dependable. Using secure fastenings is essential to prevent accidental collapses that could harm your pet. Opt for screws and bolts over nails for a more secure hold. If you’re like me and love a challenge, consider testing the crate by applying some force to ensure it withstands pressure. You wouldn’t want your curious dog pushing against a weak spot!Non-toxic Materials
Your dog’s health is directly influenced by the materials you choose. Always select non-toxic materials for the crate’s construction. While paints and finishes can make the crate look appealing, ensure they are pet-safe. I once used a beautiful varnish, only to later discover it was harmful if ingested. Imagine the relief when I found a non-toxic alternative! So, keep an eye on product labels and opt for those labeled safe for pets.Ventilation Needs
Dogs need proper airflow to stay cool and comfortable. Ensure your DIY crate has ample ventilation to prevent overheating and promote air circulation. You can create ventilation by adding holes or using a mesh design. Ask yourself: Is there a breeze flowing through? If not, it might be time to rethink your design. Remember, a well-ventilated crate is a happy and healthy space for your pet. By focusing on these safety considerations, you’re not just building a crate, but creating a safe haven for your dog. What unique features will you add to ensure your pet’s safety and comfort?Customization Options
Creating a DIY dog crate offers endless customization options. You can make it unique and comfortable. Tailor it to suit your dog’s needs and your home’s style. These customization options allow you to add a personal flair. Enhance the crate’s aesthetics and functionality effortlessly.
Personalized Touches
Add your dog’s name on the crate. Use wooden letters or paint. Create a nameplate with colorful materials. Personal touches make the crate special. Your dog will feel at home.
Try using stencils for unique designs. Shapes, patterns, or paw prints can add charm. These small details make a big impact.
Color Choices
Choose colors that match your decor. Go for bold or neutral shades. Paint the crate in your favorite color. Use non-toxic paint for safety. This makes the crate blend seamlessly with your home.
Consider using a color that soothes your dog. Soft blues or greens can create a calming effect.
Comfort Enhancements
Ensure your dog feels comfy inside. Add a soft cushion or mattress. It provides warmth and comfort. Choose washable fabrics for easy cleaning.
Include a blanket or favorite toy. These items can create a cozy atmosphere. Make the crate a welcoming space for your dog.
Step-by-step Building Guide
Discover how to build a DIY dog crate with this step-by-step guide. Create a safe and cozy space for your pet. Perfect for beginners, this project is both affordable and fun.
Creating a dog crate by yourself can be a fulfilling and rewarding project. Not only do you get the satisfaction of crafting something with your own hands, but you also tailor it precisely to your dog’s needs and your home’s aesthetics. With the right tools and materials, you can build a comfortable and secure space for your furry friend. Follow this step-by-step guide to embark on your DIY journey.Planning And Measuring
Before you start cutting wood, it’s crucial to plan and measure carefully. Begin by determining the ideal size for your dog crate. Consider your dog’s size, allowing enough room for them to stand, turn around, and lie down comfortably. Sketch a rough design of your crate, including dimensions. Think about the materials you want to use. Wood is a popular choice for its durability and aesthetic appeal. Make a list of all the materials and tools you’ll need. This preparation saves time and prevents hiccups later.Cutting And Assembly
With your plan in hand, it’s time to start cutting the materials. Use a saw to cut the wood pieces according to your measurements. Ensure that your cuts are straight and precise for a stable structure. Begin assembling the crate by first creating the frame. Secure the sides using nails or screws, depending on your preference. Double-check the stability of the structure as you go along. Attach the base and top, making sure everything aligns perfectly.Finishing Touches
The final step is all about adding those finishing touches that make a crate special. Sand down any rough edges to ensure safety and a polished look. Consider painting or staining the wood to match your home’s décor. Add a comfortable bedding inside for your dog’s comfort. Install a secure latch on the door to ensure it stays closed when needed. Now, take a step back and admire your handiwork. Isn’t it incredible what you can accomplish on your own? A DIY dog crate not only saves money but also allows you to create a personalized space for your pet. What unique features will you add to make it special for your furry friend?Maintenance Tips
Keep your DIY dog crate clean by regularly wiping it with a damp cloth. Check for loose screws or hinges to ensure safety. Use a mild detergent to remove stubborn stains or odors, keeping your pet’s space fresh and inviting.
Maintaining your DIY dog crate not only ensures its longevity but also guarantees your furry friend’s comfort and safety. Regular upkeep prevents wear and tear, keeping your crate in top shape. Whether it’s a simple weekly wipe-down or a thorough monthly inspection, these maintenance tips will help you preserve your crate’s condition effortlessly.Cleaning Techniques
Start by removing any bedding or toys from the crate. Use a vacuum or lint roller to collect loose fur, dirt, and debris.
For deep cleaning, mix a solution of mild soap and warm water. Wipe down the surfaces with a soft cloth or sponge, paying extra attention to corners and edges.
Rinse with clean water and dry thoroughly to prevent moisture buildup. Consider using a pet-safe disinfectant spray to eliminate lingering odors.
Periodic Checks
Inspect the crate for any signs of damage, such as splintered wood or loose screws. Tighten bolts and screws regularly to ensure stability.
Check for rust or wear on metal parts, and replace them if needed to maintain structural integrity.
Examine the locking mechanism to ensure it’s functioning smoothly. A secure lock keeps your pet safe and prevents accidental escapes.
Do you notice any areas that seem to wear faster than others? Addressing these early can save you from bigger repairs down the line.
By dedicating a few minutes each week to these tasks, you can keep your DIY dog crate looking and functioning like new. Your dog will appreciate the effort, and you’ll enjoy the peace of mind knowing they’re safe and comfortable.
Cost-effective Solutions
Building your own dog crate is a cost-effective solution. It saves money and allows customization to fit your space and style. Simple materials and basic tools create a cozy, safe haven for your furry friend.
Creating a cozy space for your furry friend doesn’t have to break the bank. DIY dog crates offer cost-effective solutions that can be tailored to your pet’s unique needs. With a little creativity and some handy tools, you can craft a comfortable and stylish crate at a fraction of the cost of store-bought options.Budget-friendly Materials
Finding the right materials doesn’t mean you need to spend a fortune. Look around your home for unused wood planks, old pallets, or even an upcycled piece of furniture. These can serve as sturdy bases for your DIY crate. Consider visiting local thrift stores or garage sales. Often, you can find materials like hinges, nails, and screws at a much lower price than in big box stores. Think about using non-toxic paints and sealants to ensure your dog’s safety. These are often available at a reasonable price and can add a personal touch to the crate’s design.Diy Vs Store-bought
Why choose DIY over store-bought? One major advantage is customization. Store-bought crates often come in standard sizes and designs, limiting your options. Building your own allows for creativity. You can design a crate that matches your home decor or fits perfectly in a specific space. Cost is another factor. While store-bought crates can be expensive, especially for larger breeds, DIY options allow you to control the budget. Plus, the satisfaction of building something with your own hands is priceless. Have you ever thought about the environmental impact? DIY projects often use recycled or repurposed materials, reducing waste and promoting sustainability. Ready to try your hand at building a custom crate? Remember, the journey is just as rewarding as the final product.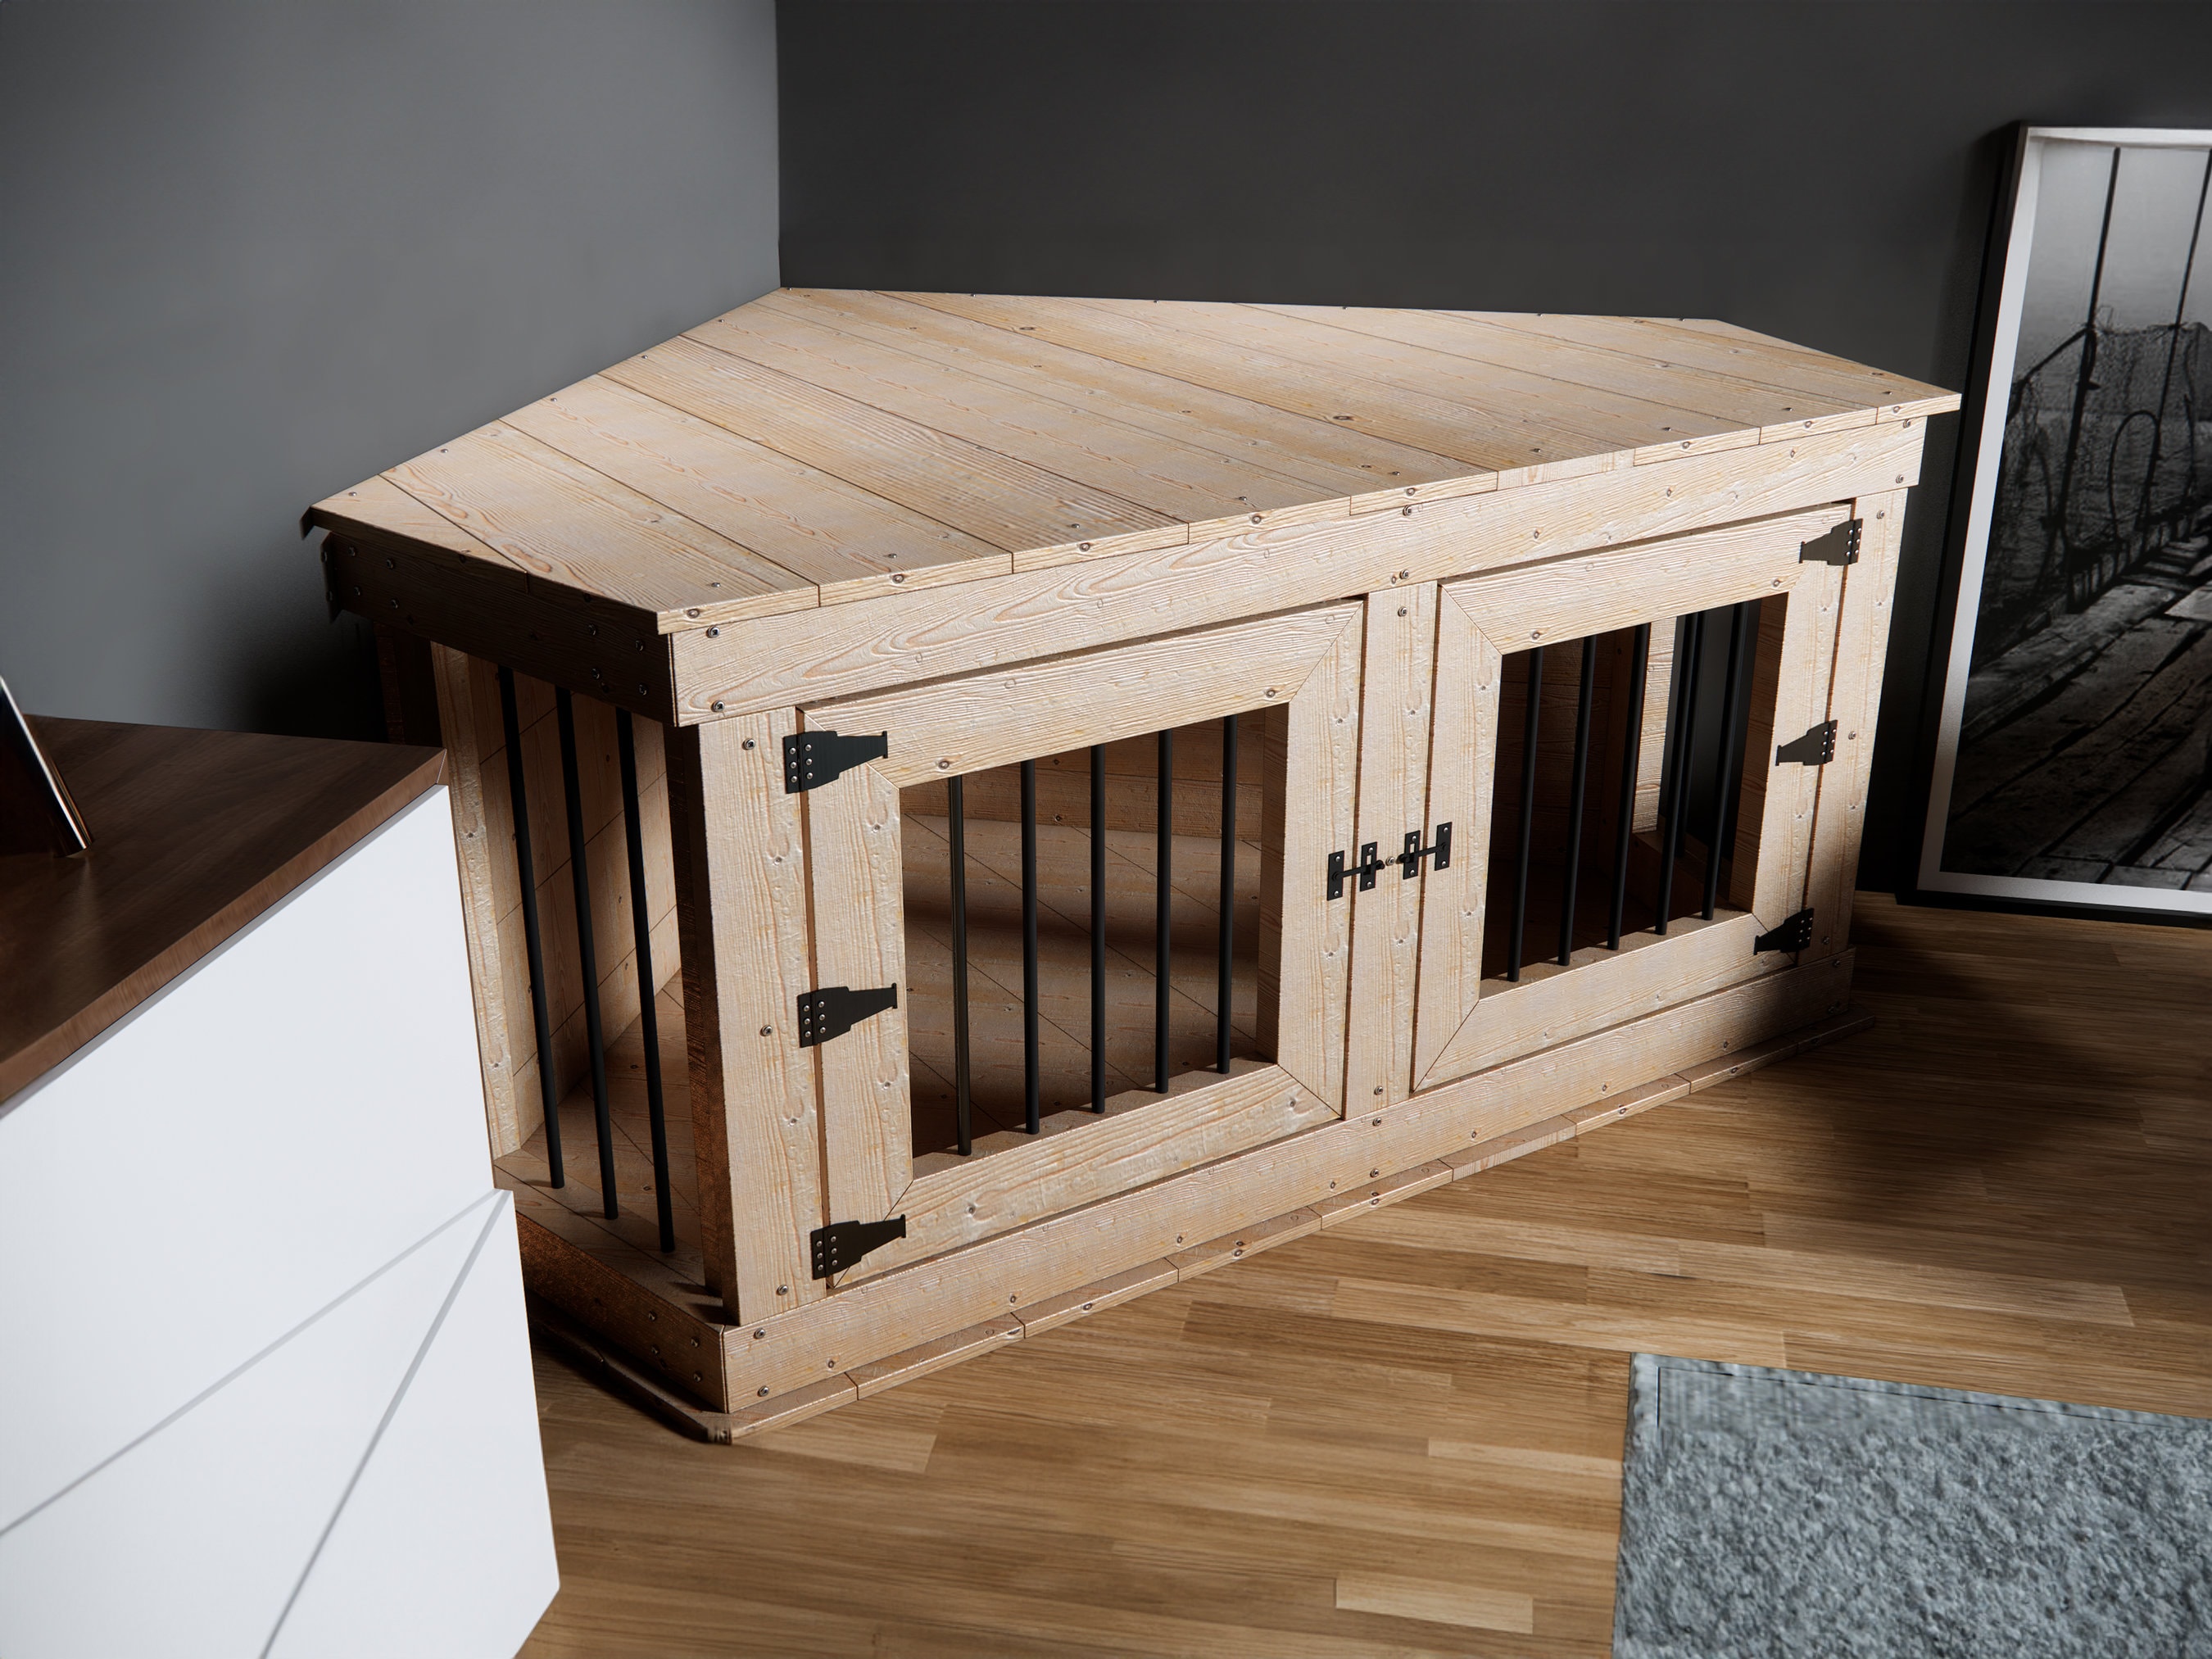
Credit: www.etsy.com
Credit: www.etsy.com
Frequently Asked Questions
What Materials Are Needed For A Diy Dog Crate?
To build a DIY dog crate, you’ll need wood panels, screws, hinges, and a latch. Consider using sandpaper for smooth surfaces. A drill and saw will help with assembly. Ensure materials are safe and non-toxic for pets. Personalize the crate with paint or stain.
How To Design A Comfortable Dog Crate?
Design a dog crate with ample space for movement. Include soft bedding for comfort. Ensure proper ventilation with mesh or slats. Incorporate a door that securely closes. Add a waterproof bottom for easy cleaning. Prioritize safety and comfort for your pet’s well-being.
Can I Customize My Dog Crate?
Yes, you can customize your dog crate to match your home decor. Use paint or stain for color. Add decorative elements like decals or name tags. Modify size to fit your space. Ensure customizations are pet-safe. Personalization enhances the crate’s aesthetic appeal.
How Long Does It Take To Build A Dog Crate?
Building a dog crate typically takes a few hours, depending on complexity. Gather materials and tools beforehand. Follow a step-by-step guide for efficiency. Allow time for paint or stain to dry. Ensure each step is completed accurately for a sturdy crate.
Conclusion
Building a dog crate yourself is rewarding and fun. It saves money and lets you customize. Your pet gets a safe and comfy space. Plus, it’s a creative project. You learn new skills and enjoy the process. Just gather the right tools and materials.
Follow the steps carefully for success. Remember, safety is key. Double-check each part for sturdiness. Your dog will thank you with wagging tails. So, start your DIY project today. Make your pet’s new favorite spot!


