How to Take a Dog Crate Down: Easy Step-by-Step Guide
If you’ve ever struggled with taking down a dog crate, you’re not alone. It can feel like a puzzle with too many pieces.
Whether you’re moving, cleaning, or simply rearranging your space, knowing the right steps can save you time and frustration. Imagine the relief of quickly dismantling the crate without a single scratch or struggle. In this guide, you’ll discover easy-to-follow steps that make the process simple and stress-free.
By the end, you’ll master the technique, leaving you with more time to enjoy with your furry friend. Ready to transform this chore into a breeze? Let’s dive in and get started.
Preparing Your Space
Preparing Your Space Take down a dog crate by unfastening the latches or clips. Gently fold the sides inward. Store it flat to save space.
Preparing to take down a dog crate might seem like a daunting task, but with a bit of organization and preparation, it can be a smooth process. Before you start dismantling, creating a clear and safe space is essential. This ensures that both you and your furry friend stay safe while you work.Clear The Area
Begin by removing any objects or obstacles around the crate. Toys, food bowls, or bedding should be relocated to prevent tripping hazards. This not only provides ample space to maneuver but also helps you focus solely on the task at hand. Imagine a clutter-free zone where you can easily move parts of the crate without knocking things over.Gather Necessary Tools
Having the right tools within reach can save you time and frustration. Depending on the type of crate, you might need a screwdriver, a pair of pliers, or even some WD-40 for stubborn screws. Make a checklist of these items and place them nearby to avoid interruptions. Have you ever started a project only to realize you’re missing a crucial tool? It’s best to be prepared from the get-go. By creating a strategic space and having all necessary tools ready, you set the stage for a hassle-free experience. Once you’ve prepared your space, taking down the crate becomes a straightforward task. Isn’t it satisfying to have everything in order before diving into a project?
Credit: www.youtube.com
Understanding Crate Types
Understanding the different types of dog crates is essential for pet owners. Crates serve as safe spaces for dogs and can be used for travel or training. Knowing how to take them down efficiently can save time and effort.
Wire Crates
Wire crates are popular for their durability and ventilation. They are made with metal wires and provide clear visibility. To take down a wire crate, first, remove any bedding or toys. Then, collapse the sides by releasing the clips or hooks. Fold the crate flat and secure it with the provided latch or clip.
Plastic Crates
Plastic crates are often used for travel. They have a sturdy base and a secure door. To disassemble a plastic crate, start by removing the top from the base. Unscrew or unclip the fasteners that hold the two parts together. Store the top inside the base to save space.
Fabric Crates
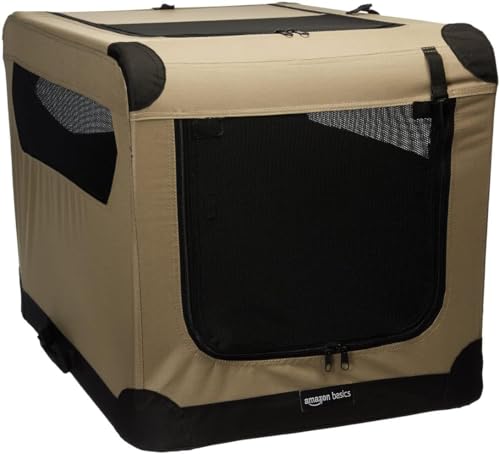
Fabric crates are lightweight and portable. They are ideal for indoor use or gentle travel. To collapse a fabric crate, unzip or unclip the panels. Push the sides inward to flatten the structure. Ensure all zippers and fasteners are secure when storing.
Disassembling Wire Crates
Taking down a dog crate involves releasing latches and folding panels. Carefully collapse the sides and top. Store the crate compactly for future use.
Disassembling Wire Crates can seem tricky at first. With the right steps, it becomes simple. Wire crates are popular for their sturdy structure. They are also easy to transport and store. Taking them apart requires patience and care. Follow these steps to safely disassemble your wire crate.Unlocking The Latches
Wire crates often have multiple latches. These latches secure the panels together. Start by locating all the latches on the crate. Carefully unlock each latch. Use gentle force to avoid bending the wires. Ensure every latch is fully open before proceeding. This prevents damage to the crate or injury.Collapsing The Panels
Once the latches are unlocked, focus on the panels. Begin folding the panels inward. Start with the top panel, then the sides. The panels should fold smoothly without force. Check that each panel collapses neatly. Ensure they lie flat for easy storage. This step helps in transporting the crate efficiently.Taking Down Plastic Crates
Taking down a dog crate involves unhooking the locks and collapsing the sides. Ensure you fold it carefully to avoid damage. Store it flat to save space and maintain its condition.
Taking down plastic crates might seem daunting, but with the right approach, it can be a breeze. Plastic crates are popular due to their durability and ease of cleaning, making them a common choice for dog owners. The process of disassembling them is straightforward, but knowing the steps can save you time and effort. Let’s dive into the specifics of removing doors and detaching the top and bottom parts.Removing Doors
Start by examining the door hinges. Plastic crates often feature clip-on or snap-fit hinges that secure the door. To remove the door, gently press on these hinges or clips. In some models, you may need to slide or lift the door slightly to disengage it from the frame. Take care not to force it; a bit of patience ensures you won’t damage the crate or hurt yourself. Once detached, store the door safely to avoid misplacing it.Detaching Top And Bottom
Next, focus on separating the top and bottom sections of the crate. Look for locking tabs or clips that hold these parts together. Most crates have a series of slots or grooves where the tabs fit snugly. Press or pull on these tabs gently to release them. If any clips seem stubborn, a flat screwdriver can help pry them open carefully. What tricks do you use to make this process smoother? Once separated, stack the pieces neatly; this makes storage or transportation much easier. Remember, keeping track of loose parts will save you from frustration during reassembly.Handling Fabric Crates
Start by removing any bedding and toys from the dog crate. Then, collapse the sides by releasing the locks. Finally, fold the crate flat and secure it with straps for easy storage.
Handling Fabric Crates Have you ever looked at your dog’s fabric crate and wondered if it could be packed away as easily as it was set up? Fabric crates are convenient, lightweight, and portable, but taking them down requires a bit of finesse. You might be surprised at how simple and satisfying it can be to handle these flexible structures with ease. Let’s dive into the process and ensure your fabric crate is ready for storage without a hitch.Unzipping And Folding
Begin by unzipping all openings of the crate. This might seem obvious, but it’s crucial for ensuring the crate folds smoothly without resistance. Once unzipped, gently press down on the top to collapse the structure. Think of it as folding a large piece of fabric into a neat bundle. Take each side and fold it inward, creating a compact form that’s easy to store. Notice how the crate naturally follows the seams, guiding you in folding it correctly.Storing Fabric Materials
Fabric crates are designed to withstand wear, but proper storage can extend their lifespan significantly. Consider storing the fabric in a dry place, away from moisture and direct sunlight. This prevents mold and discoloration. Use a breathable bag or container to avoid trapping moisture, keeping the fabric fresh for its next use. How do you ensure your crate stays in top shape during storage?
Credit: www.ebay.com
Tips For Safe Disassembly
Ensure the crate is empty before starting the disassembly. Release any locks or latches to fold it flat. Gently collapse the sides, keeping fingers clear to avoid pinching.
Taking down a dog crate might seem like a straightforward task, but ensuring a safe and efficient disassembly process can make a world of difference. Whether you’re storing the crate for future use or transporting it to a new location, knowing how to handle it properly can save you time and prevent damage. Here are some essential tips to guide you through the disassembly process with ease and safety.Avoiding Sharp Edges
When disassembling a dog crate, be cautious of sharp edges that can cause injuries. Always wear protective gloves to shield your hands from cuts and scrapes. Check each corner and connection point carefully. Often, these areas can have sharp metal or plastic parts exposed during disassembly. Think about how you’ll manage the crate parts once disassembled. Would stacking them safely in a designated area help prevent accidental injuries?Preserving Crate Integrity
Maintaining the crate’s integrity ensures it remains functional for future use. Avoid forcing parts apart, which can lead to bending or breaking. Take note of how pieces fit together as you disassemble; this makes reassembly simpler and ensures nothing is damaged in the process. Use a camera to snap quick photos if needed, creating a visual guide for later. Store the disassembled parts in a dry, safe place. Moisture or improper storage conditions can warp or damage the crate material over time. By following these practical tips, you ensure your dog crate remains in great condition, ready for use whenever needed.Cleaning And Maintenance
Taking down a dog crate involves folding the sides inward and removing the tray. Ensure all latches and locks are undone for easy disassembly. Proper storage helps maintain the crate’s longevity.
Cleaning and maintenance of your dog crate are essential tasks. They ensure a safe and healthy space for your pet. Regular upkeep extends the life of the crate, keeping it functional and fresh. It also prevents the buildup of dirt and bacteria, which can affect your dog’s health. Let’s explore the key steps to maintain your dog’s crate in top condition.Wiping Down Surfaces
Start by removing all items from the crate. Use a damp cloth with mild soap to wipe down all surfaces. Focus on corners and crevices where dirt accumulates. Rinse the cloth frequently to avoid spreading grime. Ensure you cover both the interior and exterior of the crate. For stubborn stains, use a pet-safe cleaner. Finish by drying the crate with a clean towel.Inspecting For Damage
After cleaning, inspect the crate for any signs of wear. Check for broken wires or sharp edges that could harm your dog. Look for loose screws or hinges that might need tightening. Pay attention to any rust spots, especially in metal crates. Replace any damaged parts to ensure the crate remains safe. Regular inspections help catch issues before they become serious problems.Storing Crate Parts
Start by removing the crate’s door and any divider panels. Fold the crate sides inward, collapsing it flat. Detach connecting clips or pins, ensuring all parts are securely stored.
Storing the parts of your dog’s crate is important for organization. Ensuring each component is in its designated place makes assembly easy later. Proper storage protects the crate from damage and prolongs its lifespan.Organizing Components
Begin by sorting the crate’s parts. Group similar items like panels, bolts, and locks together. Use labeled containers to keep these components organized. This prevents confusion when reassembling the crate. If your crate has removable liners, fold them neatly. Secure any loose parts using zip ties or rubber bands. This helps prevent losing small pieces.Choosing Storage Locations
Select a dry, cool place for storing crate parts. Moisture can cause rust on metal components. Consider storing the crate in a closet or basement. Ensure the location is free from pests. Pests can damage fabric liners or chew plastic parts. Use shelving units to keep items off the floor. This protects them from accidental spills or flooding. If space is limited, consider under-bed storage solutions. These can keep parts protected and out of sight.
Credit: www.facebook.com
Frequently Asked Questions
How Do You Collapse A Dog Crate?
To collapse a dog crate, start by removing all items inside. Locate the side latches and unlock them. Gently fold the top panel down, then fold the side panels inward. Ensure all parts are securely folded and locked for easy storage or transport.
What Tools Are Needed To Disassemble A Dog Crate?
Most dog crates don’t require tools for disassembly. They are designed for easy folding with built-in latches. However, some models might need a screwdriver. Always check the manufacturer’s instructions to ensure correct handling and avoid damage during the disassembly process.
Can You Disassemble A Crate Without Instructions?
Yes, you can disassemble a crate without instructions. Start by examining the crate’s locking mechanisms. Most crates have intuitive folding systems. Follow the natural hinges and latches to collapse it. If unsure, look up your crate model online for guidance to ensure proper disassembly.
Is It Easy To Take Down A Dog Crate?
Yes, taking down a dog crate is generally easy. Most crates are designed for quick assembly and disassembly. They feature intuitive latches and hinges. Simply follow the steps of unlocking, folding, and securing. With practice, it becomes a straightforward process, making storage and transport hassle-free.
Conclusion
Taking down a dog crate is simple and quick. Follow the steps carefully. Start by removing your dog’s belongings. Next, unclip the sides and fold the crate. Ensure all parts are securely placed for storage. Practice makes the process smoother each time.
Remember, a calm approach helps your dog feel at ease. Your organized efforts ensure a safe and tidy space. Keep these tips in mind. Soon, dismantling a crate will be second nature. With patience and practice, you can manage crates effortlessly.
Enjoy a clutter-free environment for you and your pet.